Wednesday, March 30, 2011

Red Beets Your Kids WILL Eat- Red Beet Risotto

I happened across this recipe in this month's (well April actually) issue of Wine Enthusiast Magazine. I was flipping through the pages at my son's baseball practice when I came to a photo of this beautiful red risotto. I read through the ingredients list and realized two things. First, that I had everything to make this recipe already at home. And second, it uses two items that I received in my CSA box last week.

So, this is South Beach Diet (phase 3) friendly if you use whole wheat orzo, like I did. If you want this to be gluten free, do NOT use the orzo, use the rice.


Please forgive me, I didn't take many photos. I was so stinking excited to make this that I just forgot. If I didn't want you to try it so badly, I'd remake it and retake photos. I'll be making it again next week.

I was going to blog on the loveliest beans that I cooked last week, but when I received beets in my CSA box again this week I felt compelled to post this, like NOW.

If you make the beet puree the night or day before (or even over the weekend) you can easily make this a 30 minute meal.

Also, please remember that beets stain, so please wear an apron!

Red Beet Risotto

Here's the ingredient line up...

Beet Puree:
2 red beets or three small red beets
1/2 medium onion
16 oz vegetable or chicken stock

Risotto:
5 cups veggie or chicken stock
1T olive oil
1 onion, finely diced
2 cups carnaroli rice (I used whole wheat orzo, it's what I had)
1 bay leaf
7oz red wine (I used a very approachable Pinot Noir, J Lohr - Falcon's Perch)
4oz beet puree
2T unsalted butter
2oz creme fraiche (I heavy cream, it's what I had)
2T chopped dill
2T chives
Salt and pepper to taste
Freshly grated parmesan cheese
Goat cheese (optional)

To make the puree:
I roasted my beets first (see Meet The Beets blog post for instructions) because I had plenty of time and it makes the skins SO much easier to remove.
Boil red beets and onion in stock until soft (10 minutes if you roast the beets first). Transfer to food processor or blender and puree. Set aside. BTW, I did not use all that it made.


To make the risotto:
In a small pot, bring the stock to a simmer and then turn to low heat. In a large pot or high sided skillet, heat olive oil and saute onions until tender. Add rice, bay leaf and cook for 2-5 minutes (until rice starts to turn translucent).


Add wine, stir and reduce by 3/4. Then start adding stock, one ladle at a time, stirring frequently until risotto achieves desired texture. Once desired texture is reached, add beet puree and stir.


Then finish with butter and creme fraiche (or cream). Salt and pepper to taste. Plate your dinner and top with fresh grated parmesan, chives and dill. I also topped mine with a few crumbles of goat cheese, which was not in the original recipe.


This dinner was easy, beautiful and delicious. The suggested wine paring is a Pinot Blanc, but since I had already opened the Pinot Noir, I decided to drink that with dinner. It went fine since it was a very light bodied, smooth red.

Since making this Monday night (it's now Wednesday), my kids have asked for it no less than twice a day. Don't be surprised if your kids request the "red pasta."

Enjoy!

Friday, March 18, 2011

The Advantages of a CSA or Co-Op

First of all, I need to apologize. Since baseball season has begun for my boys it's been crazy busy around these parts! I'm so backlogged on my blogging. I have dozens of pictures to go through and notes to finish writing. But, in the meantime I thought I'd do a piece on CSA's (Community Supported Agriculture). I have many friends that ask me what a CSA is, or why I always have photos of my produce, or why I even use a CSA to begin with. So, my plan here is to address all of these concerns and more.


What is a CSA?

First of all I would like to share with you Wikipedia's definition of Community Supported Agriculture:

Community-supported agriculture, a form of an alternative food network, (in Canada Community Shared Agriculture) (CSA) is a socio-economic model of agriculture and food distribution. A CSA consists of a community of individuals who pledge support to a farming operation where the growers and consumers share the risks and benefits of food production. CSAs usually consist of a system of weekly delivery or pick-up of vegetables and fruit, in a vegetable box scheme, and sometimes includes dairy products and meat.


My particular CSA group is Harvest2U and they provide me with a box of fresh, locally grown, organic produce each Wednesday. Harvest2U seeks out quality produce from reliable local farmers who use organic farming methods. This means that the produce that is delivered to me has not been treated with any chemicals or pesticides.


Benefits of a CSA


There are so many benefits of using a CSA and I will share several of them with you. It's really up to each individual to figure out if it's right for you and your family. 


Organic Produce
To me, this is the most important factor in my choice to use a CSA.  There are so many environmental variables that we have NO control over, things that may harm us and our family. By purchasing and preparing organic foods for your family you can ensure that what is going into your body is not going to have harmful effects on you. No chemicals or pesticides are ever used on these products. 


Freshness
This word does not do justice to the point I'm trying to make. Do you realize that by using a CSA you are usually getting produce that was picked within the last 24 hour? Harvest2U boxes contain produce that was still in the ground the morning you bring it home. Now really, unless you grow all of this in your own back yard and pick daily only what you are going to consume, it doesn't get much fresher than that. This would be a huge factor for me if I were researching a CSA. Ask your CSA representative when your produce is picked.
Do you understand how long it takes for produce to get from a farm to a grocery store and then on the shelves? Days. The items you are picking up at your local market have been out of the ground for days. If you are choosing something out of season, chances are they are coming from another part of the world and therefore have made a significant journey before they even arrived at the store you're shopping at. Even if you are purchasing organic produce from a health food store it's not as fresh as using a CSA.
Basically freshness leads me to my next benefit....Cost.


Cost
I know that this is perhaps the biggest concern for most people when considering a CSA. I have found that using a CSA is no more expensive than purchasing organic produce from a local store. If you purchase solely organic produce your grocery bill will increase, that is just a fact. BUT, if you are using a CSA that picks their produce within a day of that produce arriving at your house you are already ahead of the game. That produce is going to have a longer life in your home just based on the fact that it was picked the same day and hasn't been manhandled by every middle man that it takes to get it from the farm to your shopping cart. Because of this, you will end up with less waste.


Meal Planning
This benefit is two fold. It helps you stay organized which in turn reduces your grocery bill. 


Like I said, I get my CSA box each Wednesday. Usually I get an email from my CSA representative that tells me what my weekly harvest will include. Once I get that list I sit down and plan out my meals for the week. From that menu I make my shopping list for the grocery store. This way I'm not just picking up things because they look good or I think I *might* use them. My menus are balanced, healthy and well planned out. My family and my budget reaps the benefits of a little advanced planning.


Locally Grown
One of my favorite parts of my CSA is knowing that I'm supporting local farmers. My produce wasn't grown in Chile or Mexico or even another part of my state. It was grown right here in my valley by people who care about their farms, their customers and their reputation to grow quality organic produce. 


In Season
By using a CSA you are consuming produce that is in season. What does this mean? It means your produce is at it's best! It also means that it's the most economical time to grow this particular item, which is what helps keep costs down. This also gives you variety as to what you are feeding your family. One of my personal goals has always been to expose my children to a variety of foods. I'm pleased to say that  they have been eating so much healthier since I started using Harvest2U.


Health 
To me, this one is really a no brainer. I knew, without a doubt, that using Harvest2U would be the most healthy choice I could make for my family aside from farming my own produce. Since I don't have acres and acres to farm and I have a very brown thumb, farming wasn't an option for me. My original goal was to use at least one item from my Harvest2U shipment every day and then it grew to using as many as I could at once. Now I enjoy challenging myself to create new recipes or make old recipes more healthy.


What has this meant for me and my family? 
Well, since using Harvest2U a few months ago I have committed to serving my family the freshest, healthiest food I could. In this time my husband and I have lost a combined 40 pounds! That can't be bad, right?


So, if you are on the fence about joining a local CSA I encourage you to give it a try. Be prepared to change the way you think about the food that you put in your body!

Wednesday, March 2, 2011

Recipe Club Review - Chicken and Dumplings

I'm a member of an online discussion board that really has nothing to do with cooking and mostly everything to do with my love of a certain mouse. Anyhow, on said board, there exists a recipe club. One that I've been following for quite some time, but have never blogged any of the recipe selections. It's time for a change. The recipe of the month of February was chosen with the cold weather in mind, for sure. The person who chose this recipe used a trusted source for her comfort food selection, the Pioneer Woman Cooks. If you've never seen the Pioneer Woman's recipes you really should check out her blog. But be aware, her recipes are rarely low fat and almost always tasty! So, as you know, I can rarely leave a recipe alone, so here's my take on the Pioneer Woman's chicken and dumplings. It was the perfect dinner to have waiting for you when you've just come home from a REALLY cold baseball practice.

I have to say that I used whole wheat flour in lieu of the regular white flour to make this dish a bit more South Beach friendly, but with that being said, this is a phase three recipe at best. That might even be a stretch. This recipe can be made gluten free (GF) by using GF flour in place of regular flour. I also took the liberty of adding a generous portion of fresh dill. I absolutely couldn't pass it up. I received a beautiful bunch in my Harvest2U CSA shipment and it was calling to me.


Chicken and Dumplings (with a slightly South Beach friendly twist)

Here's what you'll need:

#1 on your list should be patience. This is by no means a difficult recipe, but it does take a bit of time to make.

  • 2 Tablespoons Butter (Margarine if you are on SB)
  • 2 Tablespoons Olive Oil
  • ½ cup All Purpose Flour (I used whole wheat flour)
  • 1 whole Chicken, Cut Into Pieces (I actually used four thighs)
  • Salt And Pepper
  • ½ cups Finely Diced Carrots
  • ½ cups Finely Diced Celery
  • 1 whole Medium Onion, Finely Diced
  • ½ teaspoon Thyme (I skipped this)
  • ¼ teaspoon Turmeric
  • MY ADDITION - 1 generous handfull of chopped fresh dill
  • 6 cups Low Sodium Chicken Broth
  • ½ cups Apple Cider
  • ½ cups Heavy Cream
  • Dumplings:
  • 1-½ cup All-purpose Flour (again, I used whole wheat)
  • ½ cups Yellow Cornmeal
  • 1 Tablespoon (heaping) Baking Powder
  • 1 teaspoon Kosher Salt
  • 1-½ cup Half-and-half
  • 2 Tablespoons Minced Fresh Parsley (I subbed chopped fresh dill in it's place)
  • Salt As Needed


Start by sprinkling your bird with salt and pepper. Then dredge in flour, shaking off any excess. Then, in a dutch/french oven heat butter or margarine and olive oil. When the oil is hot, brown the chicken by cooking it about 5 minutes on each side. Remove the chicken from the pot and place it aside. 


It's OK if it's undercooked, it's going back into the pot to finish it's cooking soon.


 Next, toss in those onions, celery and carrots that you've already diced. Yes, into the pot you just took the chicken out of. And, NO, don't wash the pot first! Those chicken bits and drippings are going to equate to some serious yumminess. Cook these veggies down for 4-5 minutes and then toss in the turmeric and dill (or thyme if you are using it). 


Stir this all together and then add the chicken broth/stock and your apple cider. Once that's done, put your chicken back into the pot. Now, put the cover on the pot and let it simmer for about 20 minutes. 


During this time you can put together the dumpling dough. It's totally simple. Really, really simple. Put the dry dumpling ingredients (including parsley/dill) into a large bowl and mix together. Then add your half and half, I used fat free because that's what I had. Stir everything together.


Once the 20 minutes has elapsed, remove the chicken from the pot and de-bone it, pulling the meat apart with two forks. Return the meat to the pot once it's de-boned. 


When the chicken is back in the pot, pour in the heavy cream and stir. If you're concerned about the fat in the cream that you can use fat free half and half or skim milk, but the cream just gives it a richness that I did not want to sacrifice the first time I tried this recipe.


OK, now that the cream is well incorporated, it's time to add the dumplings. Just plop them into the pot about a tablespoon at a time. Once you've done this, just put the lid back on the pot and let the dumplings work their magic for about 15 more minutes. That's it. Just serve and enjoy. I loved this recipe. Heck, I do enjoy most of the Pioneer Woman's recipes!

Wednesday, February 23, 2011

Copy Cat (Sort Of) Lettuce Cups


I've been having this huge craving for PF Chang's lettuce cups, but I know that their recipe is loaded with sugar. The chicken stir fry sauce has sugar in it as does their super delicious secret sauce. So, I was on a mission to re-create this recipe in a South Beach Diet friendly manner.

First things first. I had to locate a copy cat recipe for the PF Chang's lettuce cups. Thankfully, this wasn't a difficult task. Once I obtained the recipe I got to work converting it to be SB diet friendly. That wasn't difficult either. Then, on top of that, I wanted to incorporate as much of my CSA shipment in this dish as possible. So, in place of the water chestnuts (which I love, by the way) I used the beautiful turnips and radishes that I received from Harvest2U this week.

This recipe is SB friendly and Gluten Free (so long as you use GF soy sauce)

So, let's get started!

South Beach Diet Lettuce Cups - Modified PF Chang's copy cat recipe.

First, let me start by saying that you can easily make the sauces up the day before, and place them in the refrigerator.

What you'll need:
2T olive oil
2 boneless skinless chicken breasts
1c minced turnips
3 minced radishes
1c minced mushrooms
1 large shallot minced
1t minced garlic or two cloves minced
1 head butter lettuce, core removed

Secret Sauce
1/4c splenda
1/2c water
2T soy sauce
2T rice wine vinegar
2T sugar free ketchup
1T lemon juice
1/4t sesame oil

1T hot mustard
2t hot water
1-2 t red chile paste (optional)

Stir Fry Sauce
2T soy sauce
2t splenda
1/2t rice wine vinegar

The first thing I did was mince my turnips, radishes, mushrooms, shallots and garlic. I tossed them in a bowl and set them aside.


Next I prepared all sauces. For the secret sauce, start by dissolving the splenda in the water in a small bowl. Then add the next five ingredients to the same bowl. Give it a quick whisk with a small whisk or even a fork.


In a separate small bowl (I used a pinch bowl) add the hot mustard and water. Give this a quick whisk.

For the stir fry sauce, add all three ingredients to a small pinch bowl and give a quick stir.


Next, you'll heat the oil on medium high heat in a large frying pan or wok. Once the oil is heated, add the chicken breasts and cook 5 to 6 minutes on each side, or until done. Remove chicken from pan and let it rest on a plate or cutting board. Turn the heat down to medium low and add once more tablespoon of olive oil if needed.


Once the chicken has cooled you will want to dice it into small pieces. I would say about the size of a garbanzo bean. Turn the pan back up to med-high heat and add the chicken and the bowl of minced veggies. Drizzle stir fry sauce over the meat and vegetables and cook for 5-7 minutes or until the veggies start to become a little tender. I like a bit of crispness still to mine. If you like yours more thoroughly cooked, you'll be looking at 7-10 minutes.


Once the chicken is done spoon it into a lettuce cup and top with secret sauce. Add spicy mustard and chili paste if desired. You could also add red pepper flakes in lieu of chili paste.


This recipe is going to definitely be in my meal rotation from here on out. It was in no way a disappointment! My youngest son asked if he could have this again for dinner tomorrow night. Sadly, the answer is "no" since I have another recipe to South Beach modify on my list. Up next, Chicken and Dumplings.

Thursday, February 17, 2011

Ode To the South.....I'm Talking About Collards, Y'all!

Thanks to my dear old friend, Michelle, I'm blogging two nights in a row. OK, so she's not really "old", it's just that I've known her since I was in middle school and honestly, there aren't that many people that I still know that I've known that long.

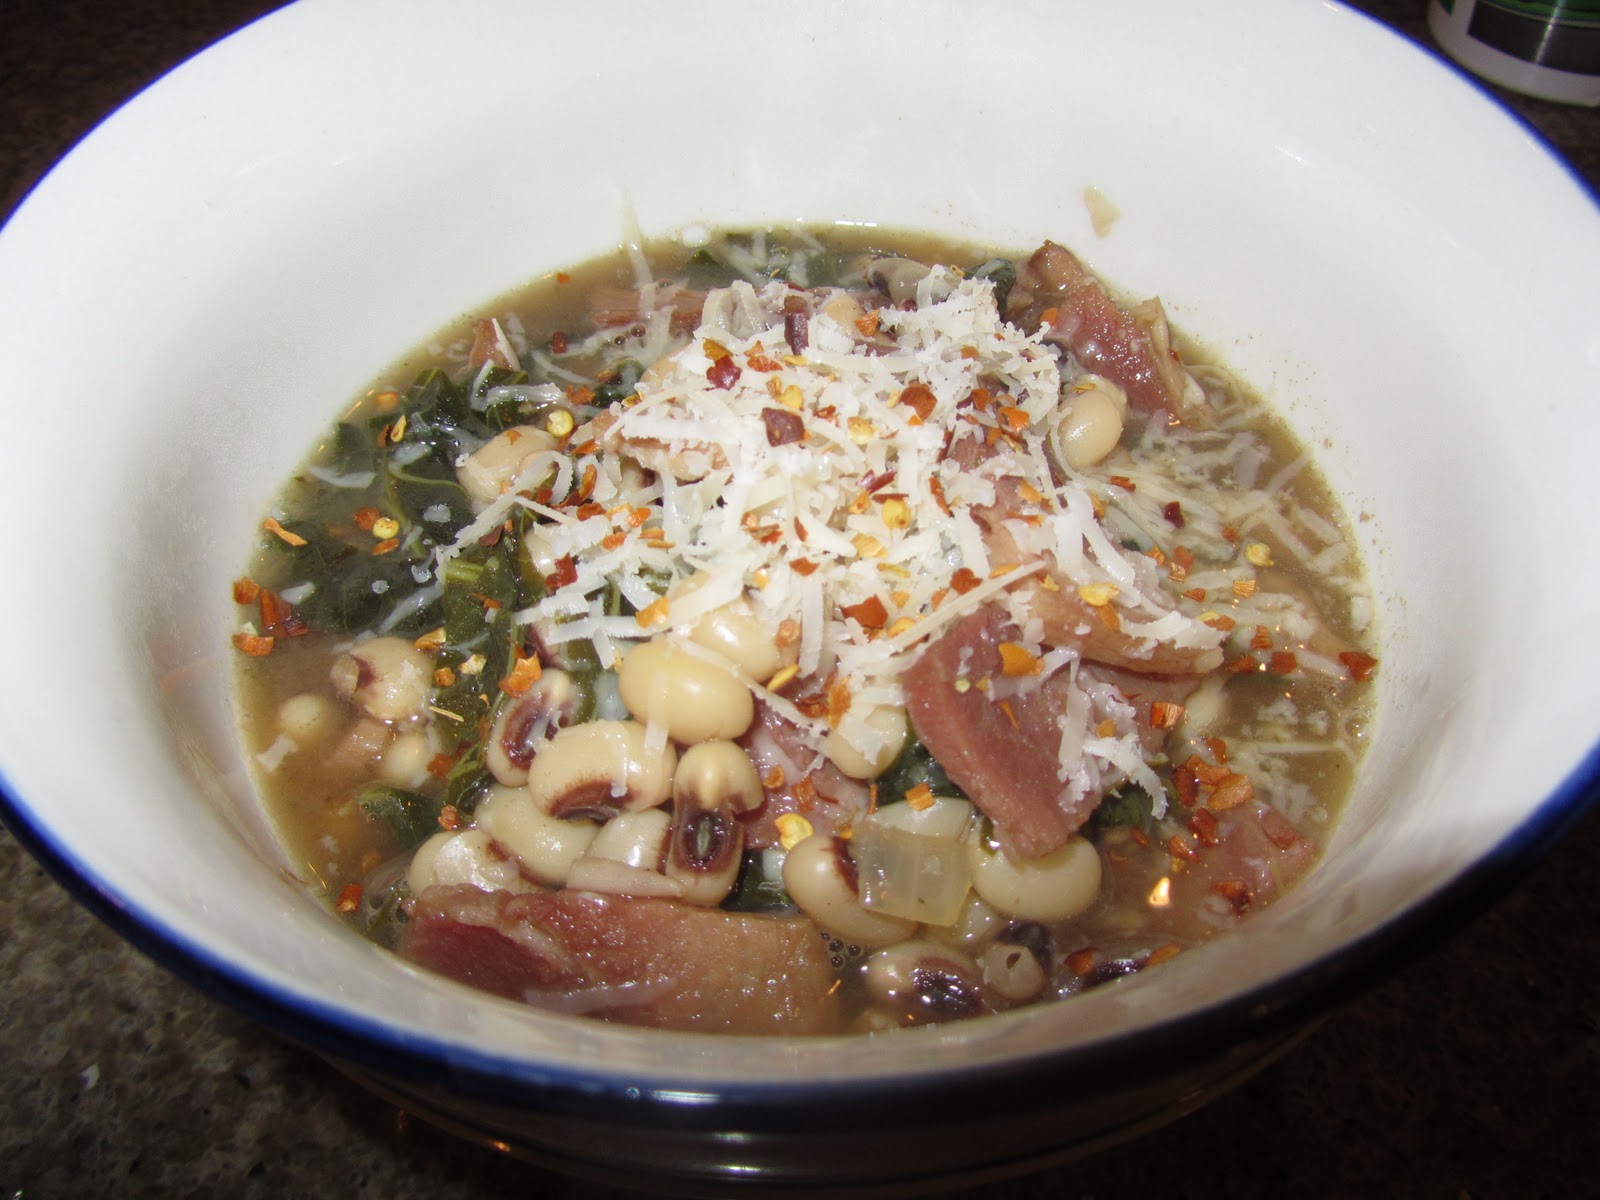
I'm not complaining, I'm actually quite happy that she requested ideas for collard greens. I made this last weekend. It was super easy, super yummy and super inexpensive to make. I received these beautiful collard greens from my local CSA, Harvest2U, last week. Also, you could use other types of greens with this recipe like mustard, beet or turnip greens. For those of you who are also Harvest2U customers, I know you received some beautiful beets with the greens attached and YES, you can use those.


Black Eyed Peas With Ham and Collard Greens

Here's what you'll need for this recipe:
1 1/2 cups black eyed peas (soaked, drained and rinsed) or 2 cans of black eyed peas
2T olive oil
1/2 large onion, chopped
3 cloves garlic, minced
salt and pepper to taste
One ham bone with some ham still on it OR two cups of diced ham.
-You could easily purchase an inexpensive ham steak for this purpose, I had ham scraps in the freezer from the holidays
4-6 cups chicken stock
1 bunch of collard greens, rinsed and rough chopped
Parmesan cheese (optional)
Crushed red pepper flakes (optional)

OK, are you ready for some seriously easy comfort food? 

Heat olive oil in a large pot or dutch oven. Saute onion and garlic until onion is translucent. Add the ham to the onion mixture and heat until the ham is warm. 


Once you've heated the ham through, add the black eyed peas, chicken stock and pepper. Cover the pot and bring to a gentle boil. 


Once the the liquid begins to boil, add the collard greens and stir. 


The collards will turn bright green and then start to wilt. 


Now, put the lid back on and turn the heat to down to low. Cook until the black eyed peas have reached the desired tenderness. I think mine took around 30 minutes or so. Also, keep an eye on the liquid level and add more if it needed.

When the black eyed peas are tender the meal is ready. Top with grated parmesan cheese and red pepper flakes if desired.
*On a side note, you could also season with Worcestershire sauce or apple cider vinegar once served. I tend to like a little vinegar in my bean soups/stews.

Enjoy!


Wednesday, February 16, 2011

Sausage, Kale and White Bean Soup

First. my apologies, I'm so extremely behind in my blogging. Life has been crazy around these parts. I'm really back logged and I'm hoping to crank a few posts out this week.

Although spring is inching it's way in to Southern California, we're still very much enjoying our winter vegetable crop. I know this because I'm still getting lovely winter squashes, beets, and greens that thrive in our winter climate from my CSA Harvest2U.


So, for this rainy Wednesday afternoon in Southern California, I'm going to share a recipe for some serious winter comfort food. If you've ever had that sausage and potato soup from the Olive Garden you'll know exactly where I'm getting my inspiration for this South Beach Diet friendly and Gluten Free (GF) version of this yummy tummy warmer.

Here's what you'll need:

1 1/2 cup dried white beans. (sorted, rinsed and soaked 8 hours)
2T olive oil
2-4 cloves of garlic, minced
1 onion diced
3-4 celery ribs diced (more if you like)
salt - to taste
pepper - to taste
herbs de provence (2-4T)
1 pound ground italian sausage (I used mild turkey sausage, but use whatever heat you like. Just make sure it's a low fat meat)
Chicken stock (I used a little more than one 32oz box)
1 large bunch of kale (rinsed and given a rough chop)
1/2c grated parmigiano-reggiano
red pepper flakes (optional)


In a stock pot or dutch oven heat olive oil and add celery, onion and garlic and saute until the onions become translucent. Add your salt and pepper and herbs de province.


Add sausage to the pan and brown.


Once sausage is browned add your kale and saute until kale begins to wilt.


Add white beans to the pot and stir.


Add enough chicken stock to cover the solid ingredients.


Give everything a good stir, cover and cook on low until beans reach desired tenderness. I cooked mine about 45 minutes. I also stirred about every 15 minutes.


Ladle this winter wonderfulness into your favorite bowl and top with freshly grated parmigiano-reggiano cheese and red pepper flakes (optional) if desired.


Here's a photo of the version without red pepper flakes for one of the boys. And just in case you were curious, my three year old told me that he likes "the soup with meat and salad in it"....how could you not laugh?

Thursday, February 3, 2011

Have No Fear!

Tonight, as I was cooking dinner I was thinking about blogging. I've got a couple of things to blog about from the last two weeks, but haven't gotten around to putting the words to my laptop. As I was thinking about this, and the taco salad I was making, I began to feel uninspired. Not that my taco salad wasn't exciting and delicious, I just wasn't feeling it.

Anyhow, I was going through my produce drawer and came across one lonely avocado. It put me in the mood for salsa. So, since I'm really trying to incorporate at least two items from my Harvest2U CSA shipment every night, I started digging around. I pulled out the last of the cherry tomatoes from last week, along with a handful of radishes, garlic chives, a red onion and some cilantro. I decided to make a 'seasonal' salsa and put as many Harvest items into it as I could.

The salsa is South Beach friendly (all phases) and gluten free (GF). The taco salad briefly described at the end of this post is also South Beach Diet friendly and GF. I did not use a taco seasoning packet as some contain flour (which is a no-no for SB and GF) and/or MSG (not GF). I used spices out of my pantry. I also didn't use any tortillas or chips. SB dieters stay away from these items, but you can add corn tortilla chips and still be GF.


So, when I say "Have No Fear," I mean, don't be afraid to go outside of the box. Don't be afraid to put your own flair into something. Seriously. It was JUST SALSA, but it was delicious, fresh and I was able to use my seasonal produce. If I cannot teach myself how to rely on seasonal produce then there is no way I can wholly support my local farmers, but that is just me though. It's a process and, for some, requires baby steps.

Here's what you'll need for this salsa. Get creative, make it what you want. It's just salsa, anyone can do this, I promise.

A handful or two of cherry tomatoes (like my super precise measurements)
one lonely avocado
1/2 small red onion
A handful of radishes (YES, radishes)
1-2T garlic chives
1/3 bunch cilantro
garlic (1-2 cloves)
salt
the juice of 1/2 a lemon (or lime, but I had a lemon)
1/2 cup black beans (totally optional)

All you have to do is dice the tomatoes, avocado, onion and radishes into salsa sized chunks, chop up some garlic chives, cilantro and garlic. Dump in the black beans. Mix everything together squeeze the lemon/lime juice on the salsa, add a dash of salt and mix again. Take a bite and add anything you want.

I used mine on top of a lovely taco salad that I made for dinner using several different types of lettuce that I had in my crisper, seasoned organic ground beef (garlic, onion, chili powder, cumin, paprika, salt and pepper), low fat cheese, a dollop of plain/non fat greek yogurt and topped with fresh salsa and hot pepper sauce. You could absolutely add a jalapeno pepper if you fancy, but I've got preschoolers and that would not be advisable! Once again, a fast, easy, completely family friendly meal that is GOOD for you.